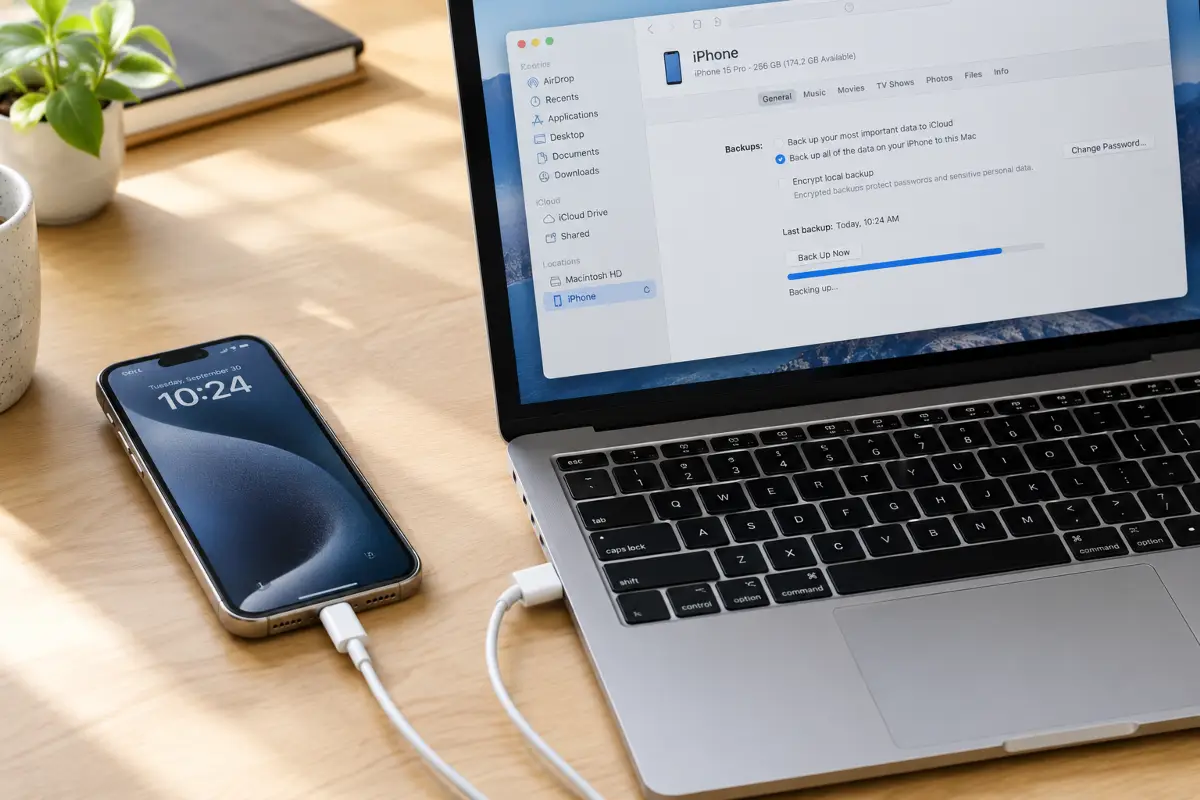
Your iPhone probably holds more of your life than your wallet does: photos, messages, notes, passwords, app data. A backup is the safety copy that saves you when the phone is lost, dropped in water or simply replaced.
In this guide you will see how to back up an iPhone to a Mac or a Windows PC, what actually ends up in that backup, and the situations where iCloud is the smarter choice.
Why an iPhone backup matters
Most people only think about backups after something goes wrong. A cracked screen that cannot be repaired, a phone left in a taxi, a failed update: in each case the phone is gone, but your data does not have to be.
A backup is a snapshot of your iPhone at a certain moment. When you set up a new phone, or restore the old one, you can bring that snapshot back and continue almost where you left off.
You can create this snapshot in two places. One is Apple's online storage, iCloud. The other is your own computer. Both are useful, and they solve slightly different problems.
Computer backup or iCloud: the real differences
Before the steps, here is the short comparison. It will help you decide what suits you.
| Feature | Computer backup | iCloud backup |
|---|---|---|
| Where it is stored | On your Mac or PC | On Apple's servers |
| Cost | Free, but uses disk space | 5 GB free, then a paid iCloud+ plan |
| How it starts | By you, with a cable or Wi-Fi sync | Automatic, once set up |
| Internet needed | No | Yes |
| Restore speed | Usually faster, it is local | Depends on your connection |
| Safe if your home is hit by theft or fire | No, unless you copy it elsewhere | Yes |
In short: a computer backup is free, fast and private. iCloud is effortless and lives away from your home. The best answer is often both, and I explain how later on.
Before you start
A few minutes of preparation will save you from the most common frustrations.
How to back up your iPhone to a Mac
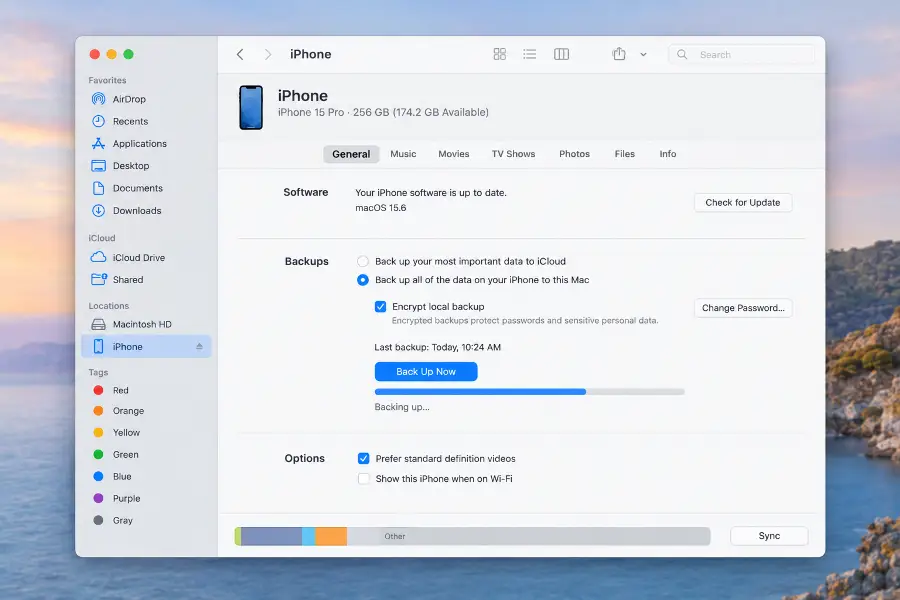
On a Mac running macOS Catalina or later, backups are handled by the Finder. You do not need to install anything.
- Connect the iPhonePlug it into the Mac with a USB cable and open a new Finder window.
- Trust the computerIf the phone asks for your passcode or shows Trust This Computer, unlock it, tap Trust and enter your passcode.
- Select your iPhoneClick your iPhone in the Finder sidebar, under Locations, then open the General tab.
- Choose where to back upIn the Backups section, select "Back up all of the data on your iPhone to this Mac".
- Encrypt it (recommended)Tick Encrypt local backup and create a password you will not forget. This also lets you keep Health and Activity data.
- Click Back Up NowWait until the progress bar finishes. When it is done, the Finder shows the date and time of your latest backup.
How to back up your iPhone to a Windows PC
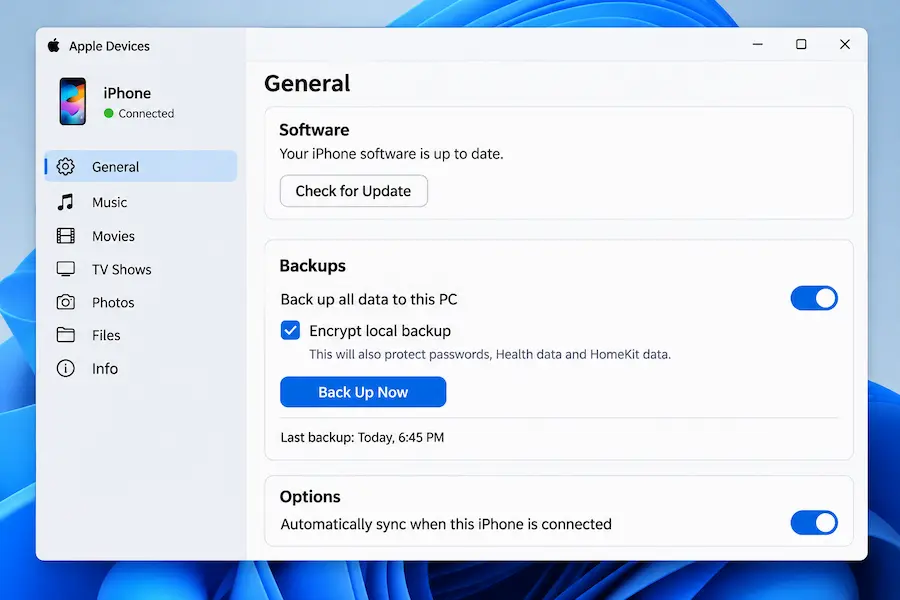
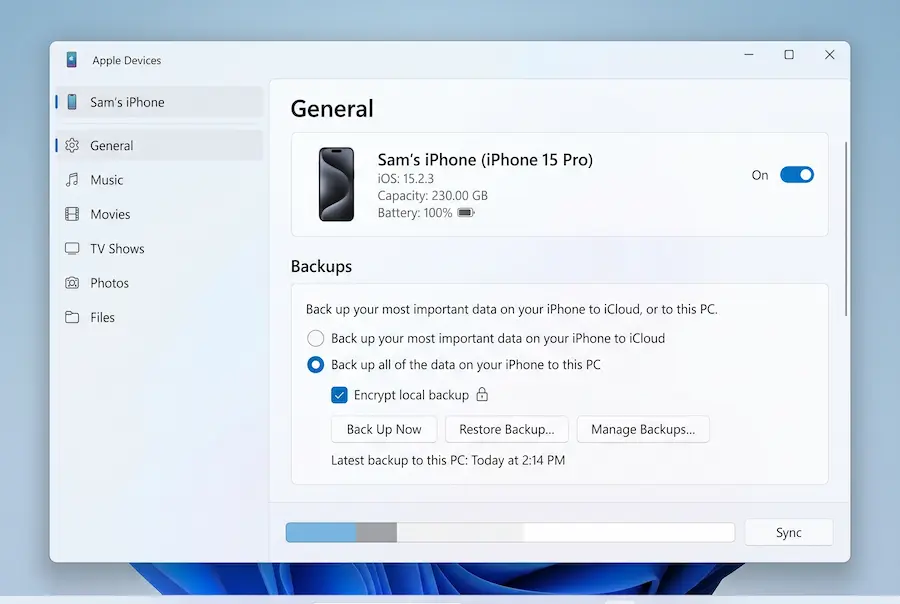
On Windows, Apple offers the free Apple Devices app in the Microsoft Store. It does what the Finder does on a Mac. If you still prefer iTunes, that works too.
With the Apple Devices app
- Install the appSearch for Apple Devices in the Microsoft Store and install it. Open it once it has finished.
- Connect and trustPlug in your iPhone, unlock it and tap Trust when asked. Enter your passcode.
- Select the iPhoneClick your phone in the app's sidebar and open General.
- Pick the computer as the destinationUnder Backups, choose the option to back up all data to this PC. Tick Encrypt local backup if you want protection.
- Start the backupClick Back Up Now and leave the cable connected until it completes.
Menu labels can change slightly between app versions, but the layout stays the same: device in the sidebar, General, then Backups.
With iTunes
If you use iTunes, click the small iPhone button at the top left, open Summary, then click Back Up Now under Backups. The Encrypt local backup box is in the same place.
Should you encrypt the backup?
Encryption locks the backup with a password, so nobody can read it without that password. For most people the answer is yes.
There is a practical bonus too. Apple only includes Health and Activity data in a computer backup when it is encrypted. Without encryption, those would be missing when you restore.
Write the password down or store it in a password manager. If you lose it, Apple cannot recover the backup for you, and the backup becomes useless.
What is saved, and where it lives
What a computer backup contains
A computer backup includes most of your phone's data and settings: messages, app data, camera roll photos, notes and your Home Screen layout. Some things are left out, mainly content that is already stored safely elsewhere.
For example, if you use iCloud Photos or Messages in iCloud, those items live in iCloud and are not copied again. Apps themselves are not stored either. They are downloaded again from the App Store when you restore. Apple also excludes certain sensitive items, such as Face ID settings and Apple Pay details.
Where the backup is stored
On a Mac, backups sit in a folder you can open from the Finder. Choose Go, then Go to Folder, and paste this path:
~/Library/Application Support/MobileSync/Backup/
On Windows, press the Windows key and R, then type %USERPROFILE% if you use the Apple Devices app or iTunes from the Microsoft Store. If you installed iTunes from Apple's website, type %AppData% instead. Then open the Apple or Apple Computer folder, followed by MobileSync and Backup.
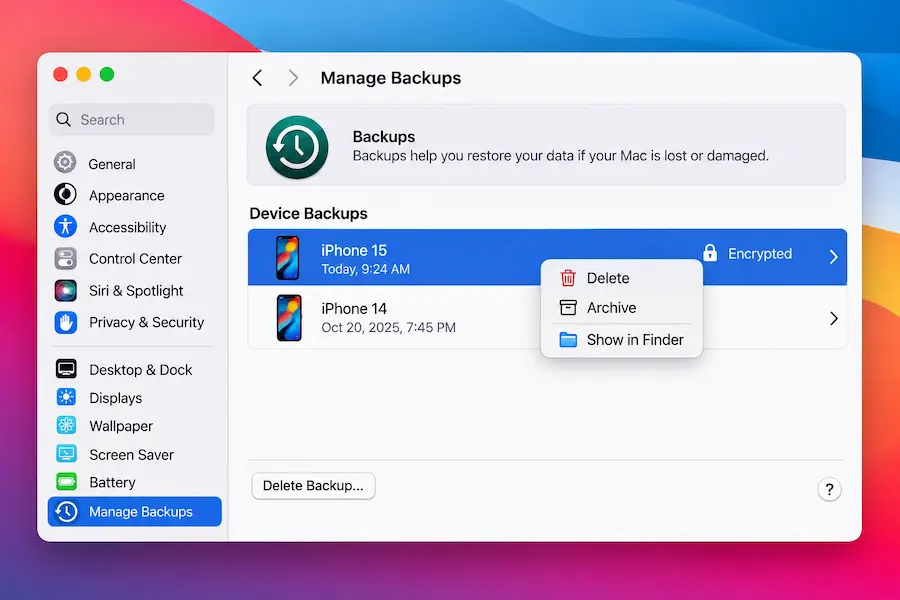
Do not rename, move or edit anything in there. To manage backups safely, open your iPhone in the Finder or the Apple Devices app and click Manage Backups. From that list you can delete an old backup or archive one, so it is not overwritten by the next backup.
When iCloud is the better choice
A computer backup is great, but it has weak spots. It only happens when you remember to plug in the phone, and it lives in the same room as the computer. That is where iCloud shines.
iCloud is better when…
You forget to back up manually.
You travel a lot, or you do not own a computer.
You want protection against theft, fire or a dead hard drive.
You want to restore a new phone straight from the internet.
A computer is better when…
Your iCloud storage is full and you do not want to pay more.
You want a fast restore without waiting on your connection.
You want full control of where the backup lives.
Your internet is slow or limited.
To turn on iCloud Backup, open Settings, tap your name, then iCloud, then iCloud Backup, and switch it on. Once it is on, your iPhone backs up by itself, usually overnight, while it is charging, locked and on Wi-Fi. You can also tap Back Up Now for a manual copy.
Keep in mind that iCloud gives you 5 GB for free, which is often not enough for a full phone. If the backup does not fit, you will need a paid iCloud+ plan. Check the current prices in your country, since they vary.
To view or delete your iCloud backups, go to Settings, your name, iCloud, Manage Storage, then Backups.
The smartest setup: use both
You do not have to choose. A simple routine covers nearly every risk:
This way, if the phone fails you have two independent copies in two different places. That is all a backup plan really needs to be.
Common problems and quick fixes
The computer does not see the iPhone
Unlock the phone and look for the Trust This Computer message. Then try another cable and another USB port, restart both devices and update the software on the computer.
The backup fails or stops halfway
Check that the computer has enough free space. Also try a different USB port, avoid hubs, and keep the phone unlocked until it finishes.
You forgot the backup password
There is no way to recover it. Create a new backup with a new password, and this time store the password somewhere safe. Until you do, treat the old encrypted backup as lost.
The backup is very slow
The first backup is always the longest. Later backups only copy what has changed, so they take much less time.
My experience
I tested this on an iPhone connected to a MacBook running a recent version of macOS, and again on a Windows 11 laptop with the Apple Devices app installed from the Microsoft Store.
On the Mac, everything worked at the first attempt once I tapped Trust on the phone. On Windows, the laptop did not detect the phone at first. The problem was a cheap charging cable that only carried power. After switching to the original Apple cable, the phone appeared in the sidebar immediately.
The first backup took clearly longer than the ones after it, which is normal. I enabled Encrypt local backup on both machines and saved the password in a password manager. It is a small step, but it means Health data is included and the backup file is unreadable to anyone else.
The biggest lesson was that I stopped relying on only one method. I now keep iCloud Backup on for the daily safety net and make a computer backup before every major update. Restoring from the computer felt noticeably quicker than waiting for a download.
💬 Comments