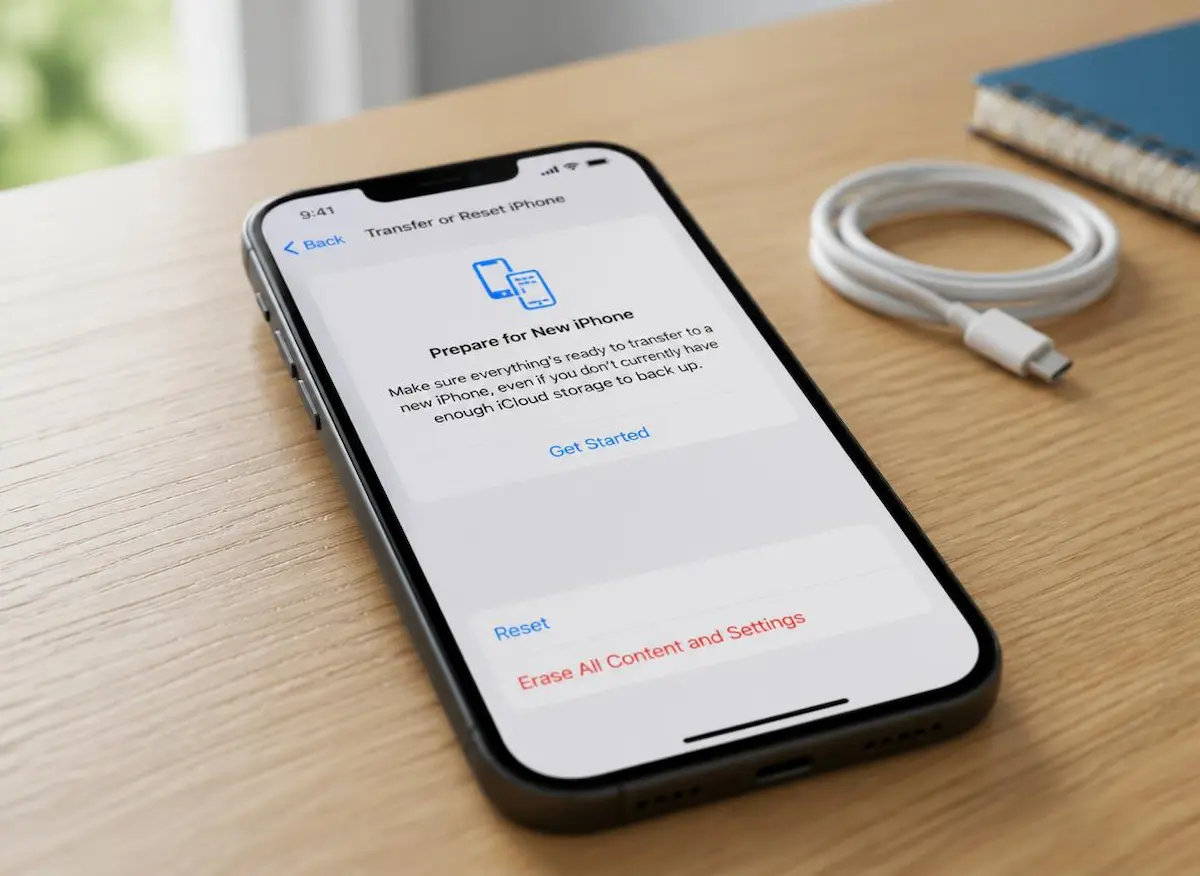
Whether you are selling your iPhone, passing it on to a family member, or troubleshooting persistent problems, a factory reset can be the right solution. It restores the device to its factory settings, removing your personal data and settings. The process is straightforward, as long as you follow the correct steps.
The most important part is preparing your iPhone before erasing it. Make sure your data is backed up, check that you can access your Apple Account, and review any settings you may need to change before handing over the device. Skipping these checks can lead to lost photos or messages, or leave the phone linked to your account. This guide explains how to reset an iPhone safely, step by step, using clear instructions for 2026.
1. What a Factory Reset Really Does
A factory reset returns your iPhone to its original setup state by removing your personal data, downloaded apps and settings. Your photos, messages, saved Wi-Fi networks and account information are erased from the device. The built-in iOS apps and the operating system itself remain in place, and your iPhone is not downgraded to an older version of iOS. You simply start again with a clean device.
On an iPhone, the option is called Erase All Content and Settings. Because iPhones use encryption to protect stored data, erasing the device removes the encryption keys needed to access that data. This makes the previous information inaccessible, even with specialized data-recovery tools.
Three Things People Often Confuse
Erase All Content and Settings performs a factory reset. It removes your personal data, downloaded apps and settings from the iPhone.
Reset All Settings restores system settings to their defaults without deleting your photos, messages, downloaded apps or other personal content. It can be a useful first step when troubleshooting certain software problems.
Restore Using a Computer allows you to erase or restore your iPhone using a Mac or Windows PC. It can be useful when the phone has serious software problems, will not start properly, or cannot be restored through its usual settings. Depending on the situation, the process may reinstall iOS.
Important: A factory reset cannot be undone. If a photo, message or other important file exists only on your iPhone and has not been backed up or synced elsewhere, you may lose it permanently. That is why the next step is so important.
2. Back Up Your iPhone First
If you want to reset your iPhone without losing your data, creating and checking a backup is essential. You can use iCloud or a computer, and you may choose to keep an additional copy for extra protection. Before proceeding, make sure the backup has finished successfully.
Option A: iCloud Backup (Easiest)
Connect your iPhone to Wi-Fi and, preferably, plug it into a power source. Open Settings, tap your name at the top, select iCloud, and then choose iCloud Backup. Make sure Back Up This iPhone is enabled and tap Back Up Now. Keep the device connected to Wi-Fi until the process finishes.
If the backup fails, insufficient iCloud storage is one possible reason. The free iCloud plan includes just 5 GB, which may not be enough for your photos, videos and device data. You can upgrade to a larger iCloud+ plan temporarily if necessary, but check the subscription terms before cancelling it. Most importantly, do not erase your iPhone until you have confirmed that the backup completed successfully.
Option B: Back Up to Your Mac or PC
On a Mac running macOS Catalina or later, connect your iPhone with a cable, open Finder, select your iPhone in the sidebar and choose the option to back up your device. On Windows, you can use the Apple Devices app, available through the Microsoft Store. If you use an older setup, iTunes may also be available for this purpose.
If you want to preserve additional sensitive information, select Encrypt local backup and create a password when prompted. An encrypted computer backup can include information that an unencrypted backup does not, such as saved passwords, Wi-Fi settings, Health data and call history. Store the password somewhere safe: you will need it to restore that encrypted backup later.
Which Backup Method Should You Choose?
| Method | Where It's Stored | What You Need | Best For |
|---|---|---|---|
| iCloud Backup | Apple's cloud servers | Wi-Fi and sufficient iCloud storage | Convenient backups without a computer |
| Mac (Finder) | Your Mac's storage | A cable and enough free disk space | Local backups and an additional copy of your data |
| Windows PC | Your PC's storage | Apple Devices or a compatible version of iTunes, plus a cable | Windows users who prefer local backups |
What a Backup May Not Include
Some information is stored or managed separately from your device backup. Check the following before erasing your iPhone.
Photos. If iCloud Photos is enabled, your photos and videos sync separately with iCloud rather than being included in your iCloud device backup. Open the Photos app and check the library's sync status to make sure uploads have finished. If iCloud Photos is disabled, your photos may be included in your device backup, but copying important files to a computer or another storage location provides an additional safeguard.
WhatsApp chats. WhatsApp has its own chat-backup settings. Open WhatsApp, go to Settings, select Chats, and then choose Chat Backup. Run a backup and verify that it has completed before erasing your iPhone. This is particularly important if your conversations are valuable to you.
Authenticator apps. Do not assume that authentication codes will automatically transfer to your next device. Check the recovery or transfer options for apps such as Google Authenticator, and save any account recovery codes you may need. Otherwise, you could lose access to accounts that require two-factor authentication.
Apple Pay and Face ID. For security reasons, payment cards and Face ID settings are not restored from a backup. You will need to set them up again after resetting your iPhone.
3. Things to Do Before You Erase Your iPhone
These simple checks take only a few minutes and can prevent problems later, especially if you are selling your iPhone or giving it to someone else.
Unpair Your Apple Watch
If you have an Apple Watch paired with your iPhone, unpair it first using the Watch app. During this process, your iPhone attempts to create a backup of your watch and removes the watch's Activation Lock, making it easier to pair with another iPhone later.
Check Your SIM or eSIM
If your iPhone uses a physical SIM card, remove it using the SIM eject tool before handing over the device. An eSIM works differently: during the erase process, you may be given the option to keep or delete it. If you are keeping the iPhone and continuing to use the same mobile plan, you may want to retain the eSIM. If you are selling or giving away the phone, deleting the eSIM is usually appropriate, but check with your carrier first to make sure you can transfer or reactivate your plan on another device.
Switching to Android?
If you are moving to an Android phone, turn off iMessage before switching devices. Otherwise, some messages from people using iPhones may continue to be sent through iMessage instead of arriving as regular text messages. On your iPhone, open Settings, select Apps, then Messages, and turn off iMessage. The exact menu path may differ on older versions of iOS. If you no longer have access to your iPhone, Apple also provides an online tool to deregister your phone number from iMessage.
Check Your Apple Account and Find My
If you are giving your iPhone to someone else, make sure you can access your Apple Account and know its password. During the erase process, you may be asked to enter your credentials to turn off Find My and remove Activation Lock. You can also sign out beforehand by opening Settings, tapping your name and selecting Sign Out. Follow the on-screen instructions.
If you are keeping the iPhone, you generally do not need to sign out manually beforehand. The erase process will guide you through the required authentication steps. If you are handing the phone over to someone else, however, make sure Activation Lock is removed before completing the handover.
4. How to Factory Reset Your iPhone Step by Step
Before you begin, make sure your backup has completed successfully and your important data is safe. It is also a good idea to connect your iPhone to a power source so the battery does not run low during the process. Then follow these steps:
Open Settings and tap General.
Scroll down and tap Transfer or Reset iPhone.
Select Erase All Content and Settings.
Review the information displayed on the screen and tap Continue when prompted. If you are given the option to finish uploading data to iCloud, check that your important information has been backed up or synced before proceeding.
Enter your iPhone passcode and, if requested, your Apple Account password to authorize the erase and turn off Find My.
If your iPhone uses an eSIM, review the available options and decide whether to keep or delete it, depending on whether you will continue using the mobile plan on this device.
Confirm the erase when prompted. Your iPhone will display the Apple logo and a progress indicator before restarting. When the process is complete, the Hello screen will appear.
Tip: If you are selling or giving away your iPhone, stop when the Hello screen appears and switch the device off. Do not continue through the setup process or sign in with your own Apple Account. The new owner can complete the setup using their own account.
5. Understanding Activation Lock
Activation Lock is Apple's anti-theft feature. When Find My is enabled, your iPhone is linked to your Apple Account. If someone erases the device, they may still need the Apple Account credentials associated with it to activate and use it again. This helps protect your device if it is lost or stolen, but it can cause problems if you forget to remove the lock before selling or giving away your iPhone.
Erasing your iPhone does not automatically remove Activation Lock in every situation. To prepare the device for a new owner, you must turn off Find My or remove Activation Lock through Apple's supported process. This normally happens when you sign out of your Apple Account or authenticate during the erase process.
How to Check That Activation Lock Has Been Removed
After erasing your iPhone, let it start up to the Hello screen. If you are preparing it for someone else, begin the initial setup far enough to connect to Wi-Fi and reach the activation stage. If the iPhone asks for the Apple Account credentials of its previous owner, Activation Lock is still active. If you can continue setting up the device without those credentials, it is no longer asking for the previous owner's account. Stop before entering your own personal information if you are preparing the phone for sale.
You Already Handed Over the iPhone and Forgot to Remove Activation Lock
You can usually resolve this remotely. Go to iCloud.com/find and sign in with the Apple Account linked to the iPhone. Select the device from your list and follow Apple's instructions to erase it if necessary. Once the erase is complete, select Remove This Device to remove Activation Lock. If the iPhone is offline, the remote erase will begin when it reconnects to the internet. Follow the on-screen instructions carefully, as the available options can depend on the device's status.
You Bought a Used iPhone That Is Locked
Contact the seller and ask them to remove Activation Lock from their Apple Account. If the seller cannot or will not do this, consider returning the device. Apple may be able to help with an Activation Lock support request if you have acceptable proof of purchase. Avoid paying for third-party online unlocking services that promise to bypass Apple's security protections.
6. What to Do If You Cannot Access Your iPhone
If you have forgotten your passcode and your iPhone displays iPhone Unavailable or Security Lockout, you may still be able to erase it without using a computer. However, erasing the device deletes its local data, so anything that has not been backed up or synced elsewhere may be lost.
Option A: Erase the iPhone Without a Computer. On supported versions of iOS, the lock screen may display an option such as Forgot Passcode? or Erase iPhone. Follow the instructions to reset the device. You generally need an active Wi-Fi or cellular connection, Find My enabled beforehand, and your Apple Account password. The exact wording and steps depend on your iOS version.
Option B: Restore the iPhone Using a Computer. Connect your iPhone to a Mac or Windows PC with a compatible cable. On an iPhone 8 or later, press and quickly release the volume-up button, press and quickly release the volume-down button, then press and hold the side button until the recovery-mode screen appears. Keep holding the button even if the Apple logo appears first.
On a Mac, open Finder. On Windows, open the Apple Devices app. Select your iPhone and choose Restore when the recovery options appear. The computer will download the necessary software and reinstall iOS. If the download takes too long and the iPhone exits recovery mode, let the download finish and repeat the recovery-mode steps.
After the restore, you may still need the Apple Account credentials previously associated with the iPhone because Activation Lock can remain enabled. If you have forgotten your Apple Account password, use Apple's official account recovery process before continuing.
7. Set Up Your iPhone and Restore Your Data
When the Hello screen appears, your iPhone is ready for initial setup. If you are keeping the device, you can now restore your data and reinstall your apps.
Select your language and region, then connect to a Wi-Fi network. If you have another compatible iPhone nearby, Quick Start can help you transfer your data to the new or reset device. Alternatively, continue to the Transfer Your Apps & Data screen and choose From iCloud Backup or the appropriate computer-backup option. Sign in with your Apple Account, select the backup you want to use, and follow the on-screen instructions.
Your apps may appear as greyed-out icons while they download. Depending on your backup size and internet connection, restoring everything can take some time. Photos, messages and other synced information may continue to appear after the initial setup is complete. Keep your iPhone connected to Wi-Fi and, preferably, a power source while the process finishes.
When the restoration is complete, check that your important data is present. Set up Face ID again and add your payment cards to Apple Pay when you are ready. You may also need to sign in again to some apps and services.
8. Final Checklist Before Selling or Giving Away Your iPhone
Before handing your iPhone over to its new owner, check each of the following:
Back up your data. Confirm that your iCloud or computer backup completed successfully and that important photos and files are safely stored.
Unpair your Apple Watch. If you use one with the iPhone, unpair it before erasing the phone.
Erase your personal data. Use Erase All Content and Settings and complete the required authentication steps.
Remove Activation Lock. Make sure Find My is turned off and the iPhone is no longer linked to your Apple Account for activation.
Check your SIM or eSIM. Remove the physical SIM card. If the iPhone uses an eSIM, make sure it is deleted when appropriate and that your mobile plan is available on your replacement device.
Stop at the Hello screen. Do not sign in with your own Apple Account or complete setup for the next owner.
Check the device's condition. Decide whether to include the case and screen protector, and remove any accessories you intend to keep.
If you are trading in your iPhone through a store or mobile carrier, confirm that the device has been erased and Activation Lock has been removed before you leave. Taking a moment to check these details can prevent delays or problems with the handover.
9. Important Things to Check Before Resetting an iPhone
Before resetting an iPhone, make sure you have access to your Apple Account and know its password. You may need these details to restore your data or set up the device again. If you plan to give the phone to someone else, signing out of your account and turning off Find My are also important steps.
Check that your latest iCloud backup has completed successfully rather than assuming that automatic backups have saved everything. If you use messaging apps such as WhatsApp, check their individual backup settings as well. Some apps require a separate backup procedure to preserve their chat history.
Storage space is another detail worth checking in advance. If your iCloud account does not have enough available space, the backup may fail or remain incomplete. You should resolve this before erasing the device, especially if you cannot afford to lose photos, documents or conversations.
Finally, consider your eSIM before starting the reset. Depending on the options you select, you may be able to keep or erase it. If you are transferring the iPhone to another person, make sure you understand which option is appropriate for your mobile plan. Taking a few minutes to check these details can prevent unnecessary problems during setup or data restoration.
💬 Comments