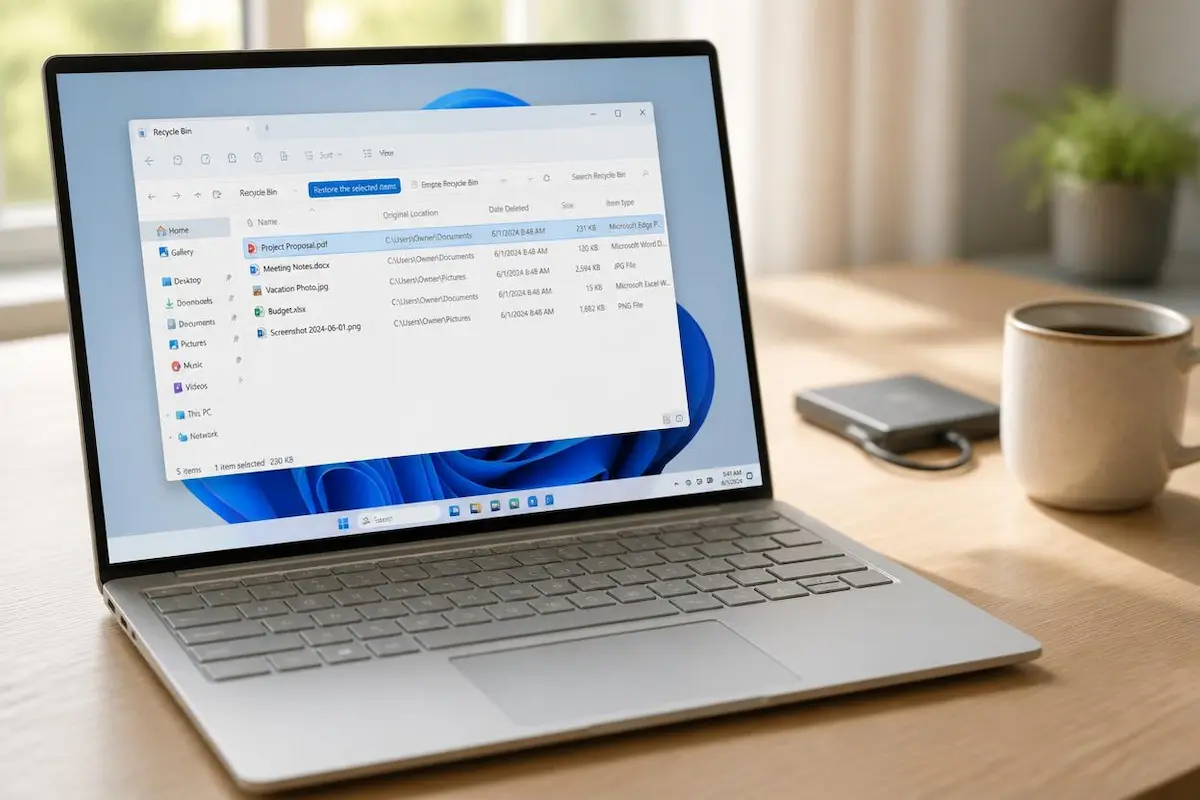
Deleted a file by accident? Don't panic. In many cases, you can still recover it, and there are several free methods you can try before giving up.
This guide walks you through the most useful file recovery methods for Windows in 2026, starting with the Recycle Bin and moving on to Microsoft's own recovery tool. You'll also learn which mistakes to avoid so you don't reduce your chances of getting your files back.
Why deleted files can often be recovered
When you delete a file in Windows, the system usually doesn't erase its contents immediately. Instead, it marks the space occupied by the file as available for new data. Until that space is overwritten, some or all of the original data may still be recoverable.
Think of a library that removes a book's card from its catalogue but leaves the book on the shelf. The book remains there until someone replaces it. A deleted file works in a similar way: its data may remain on the drive until new information overwrites it or the storage device clears it.
That's why acting quickly matters. Every download, update, screenshot or temporary file saved to the same drive can reduce your chances of recovering the deleted file.
The golden rule: stop saving files to the drive where the deleted file was stored. If you recover it, save the recovered copy to a different drive, such as a USB stick or an external disk.
One important warning about SSDs
Most modern laptops use an SSD rather than a traditional hard drive. Windows can use a feature called TRIM to tell an SSD which storage areas are no longer needed. The SSD may then clear those areas in the background, making recovery more difficult or even impossible. Recovering deleted files from an SSD can therefore be less reliable than recovering them from a traditional hard drive. It's still worth trying the available options, but don't assume the files can always be recovered.
The recovery methods I recommend
Start with the simplest options and move on to recovery software only if necessary. Here is the order to follow:
Windows 11 or Windows 10?
The instructions below are written for Windows 11 and also apply, with minor differences, to Windows 10. Keep in mind that standard support for Windows 10 ended on 14 October 2025. Microsoft recommends moving to Windows 11, although eligible devices may receive security updates through the Extended Security Updates (ESU) program.
Method 1: Undo the deletion or check the Recycle Bin
If you've just deleted a file, try the quickest option first. Press Ctrl + Z in the same File Explorer window, provided the deletion was your last action that can be undone. If Windows can reverse it, the file should return to its previous location.
If that doesn't work, check the Recycle Bin. Files deleted normally from your computer usually remain there until you restore them or empty the bin.
How to restore a file from the Recycle Bin
- Double-click the Recycle Bin icon on your desktop. If you can't see it, press the Windows key and type Recycle Bin.
- Find the file you want to recover. Use the search box or sort the list by Date deleted to find recently deleted items.
- Right-click the file and select Restore. Windows will return it to its original location. Depending on your Windows version and window size, you may also see a restore option on the toolbar.
Why a deleted file might not be in the Recycle Bin
Some files bypass the Recycle Bin entirely. This can happen when:
- You delete a file using Shift + Delete.
- You delete files from a USB drive, an SD card or certain network locations.
- You delete files using commands or applications that bypass the Recycle Bin.
- A file is too large for the Recycle Bin's configured capacity, or you have already emptied the bin.
- You delete an online-only OneDrive file. It may not appear in your computer's Recycle Bin, so check the Recycle Bin on the OneDrive website instead.
If any of these situations applies to you, continue with the next methods.
Method 2: Check OneDrive and other cloud backups
If your Desktop, Documents or Pictures folders are synced with OneDrive, a deleted file may still be available in the online Recycle Bin. You might have enabled folder backup without realising it, so it's worth checking even if you don't normally use OneDrive directly.
- Open onedrive.com and sign in with the Microsoft account or work or school account linked to your computer.
- Select Recycle bin in the left-hand menu.
- Select the files you want to recover and click Restore.
How long do deleted files remain there? For personal OneDrive accounts, items are generally kept in the online Recycle Bin for 30 days. For work or school accounts, the retention period is generally 93 days, although an administrator may change it. If a file has been permanently deleted from the Recycle Bin, normal restoration through that bin is no longer available.
Microsoft 365 subscribers have another recovery option: they can restore an earlier version of a file when version history is available, or restore their entire OneDrive to an earlier point within the previous 30 days. This can be particularly useful after accidentally deleting many files or when recovering from a malware incident. Availability and recovery options depend on the account and the circumstances.
Also check Dropbox, Google Drive and any other cloud service you use. Visit its website and look for a Trash, Bin or Deleted files section. A cloud copy or backup may save you from having to use recovery software.
Method 3: File History and Previous Versions
This method can be very useful, but it only works if a suitable backup or previous version was created before the file disappeared. File History can keep copies of files on another drive or network location, allowing you to recover deleted files and restore earlier versions.
Check whether File History is available
Open Control Panel, go to System and Security and select File History. If File History is enabled and a backup drive is configured, you may be able to recover your file. If it isn't enabled and no suitable backup exists, move on to the next method.
Restore a deleted file
- Open File Explorer and browse to the folder that originally contained the file, such as Documents. If the file was stored directly in the root of a drive, select that drive instead.
- Right-click the folder and select Restore previous versions. In Windows 11, you may need to select Show more options first. Alternatively, open the folder's Properties and select the Previous Versions tab.
- Select a version dated before the file was deleted. Choose Open to inspect the available contents, if that option is available.
- If you find the missing file, copy it to a different folder or drive so you don't overwrite your current files.
Previous versions may come from File History or restore points.
Why choose Copy instead of Restore? Restoring a previous version can replace the current contents of the folder, potentially removing newer files. Copying lets you retrieve the file you need without replacing the entire folder with an older version.
If the Previous Versions tab is empty, Windows may not have a suitable copy available. Previous versions can come from File History or, in some circumstances, restore points created when System Protection is enabled. However, restore points are not a substitute for a dedicated file backup, and you shouldn't rely on them to recover personal files.
Method 4: Windows File Recovery, Microsoft's free tool
Windows File Recovery is a free recovery tool from Microsoft. It doesn't have a conventional graphical interface; instead, you run it by entering commands. It can help recover files that are no longer available in the Recycle Bin or a backup, although success is never guaranteed.
The tool is available for Windows 10 version 2004 and later, as well as Windows 11. It supports recovery from compatible local storage devices, including internal drives, USB drives and SD cards. Supported file systems include NTFS, FAT and exFAT. The recovery mode you need depends on the file system and what happened to the files. Windows File Recovery is not intended for recovering files directly from cloud storage or network file shares.
Before you start
You need two different drives: the drive containing the lost files and a separate destination drive for the recovered copies. A USB stick or external drive can work. Do not save recovered files to the same drive you're scanning, because doing so could overwrite other data you want to recover.
Install and run it
- Open the Microsoft Store, search for Windows File Recovery and install the app published by Microsoft.
- Press the Windows key, search for Windows File Recovery and open it. Approve the administrator prompt when asked.
- Enter a command using this general format:
winfr source-drive: destination-drive: /mode /switches.
Which recovery mode should you use?
- Regular mode: use it first for recently deleted files on a healthy NTFS drive.
- Extensive mode: use it for older deletions, formatted or corrupted NTFS drives, and drives formatted with FAT or exFAT, such as many USB sticks and SD cards.
- Signature mode: use it when you want to search for particular file types based on their internal signatures. It can be useful when normal filename-based recovery isn't enough.
The /n switch lets you narrow the search by filename, file path, file type or a wildcard pattern. Here are three examples. In each case, replace the drive letters and username with the ones that apply to your computer.
In these examples, C: or D: is the source drive, and E: is the separate destination drive. Make sure the destination drive exists and has enough free space. If a path contains spaces, enclose the path in quotation marks.
When the recovery process finishes, Windows File Recovery creates a folder named Recovery_ followed by the date and time on the destination drive. Check that folder for the recovered files. The tool may ask you to confirm before starting the recovery operation.
Recover files by type
If you want to search for photos by file type rather than filename, use signature mode. For example, this command searches drive C: for supported JPEG and PNG files and saves the results to drive E:
winfr C: E: /signature /y:JPEG,PNG
To see the supported file groups and extensions, enter winfr /#. Files recovered using signature mode may have generic filenames or lack their original folder structure, so you may need to open them individually to identify their contents.
Method 5: Free recovery tools with a graphical interface
If you prefer a regular Windows app with buttons instead of typed commands, or Windows File Recovery couldn't find your file, these tools are worth considering. Each has different strengths, so choose the one that best fits your situation.
| Tool | Cost | Interface | Best for |
|---|---|---|---|
| Windows File Recovery | Free | Command line; Microsoft's official tool | Recovering files from compatible local drives and removable storage |
| Recuva | Free version; Professional is paid | Windows app with a step-by-step wizard | Beginners and straightforward recovery attempts |
| PhotoRec | Free, open source | Text interface; QPhotoRec offers a graphical interface | Searching for files on formatted or damaged storage |
| Disk Drill Basic | Free recovery up to 500 MB on Windows | Windows app with file previews | Recovering a limited amount of data |
Recuva
Recuva is a long-standing file recovery tool developed by Piriform, the company behind CCleaner. It is now part of Gen Digital's product portfolio. The latest version listed on the official version history page at the time of writing is 1.55.133, released on 22 June 2026.
The free version includes advanced file recovery and is a reasonable starting point for everyday recovery attempts. The paid Professional edition adds features such as virtual hard drive support, automatic updates and priority support. Check the official website for current pricing and edition details.
Start the wizard, select the type of file you're looking for and choose its previous location. If the first scan doesn't find it, try Deep Scan. Recuva uses coloured indicators to estimate the condition of recovered files: green generally indicates a better chance of recovery, while orange and red indicate more serious problems. These indicators are estimates, not guarantees that a file will open correctly. Always save recovered files to a different drive.
PhotoRec
PhotoRec is a free, open-source recovery tool that searches for files using their underlying data signatures rather than relying entirely on the file system's directory information. This approach can help when a drive has been formatted or its file system is damaged, although successful recovery is not guaranteed.
The latest stable release listed by its developer is version 7.2. PhotoRec is distributed in an archive with TestDisk, so you can download the package, extract it and run the appropriate program without a traditional installation. The standard PhotoRec interface is text-based, while QPhotoRec provides a graphical interface.
One important trade-off is that PhotoRec generally cannot preserve the original filenames and folder structure. Recovered files may be placed in newly created folders with generic names, so you might need to inspect them individually. Download it from the official CGSecurity website rather than an unfamiliar third-party download site.
Disk Drill Basic
Disk Drill offers a polished interface and lets you preview files found during a scan. Its Basic edition for Windows allows you to recover up to 500 MB of data for free. That may be enough for a few documents or photos, but it is unlikely to cover a large collection of videos. Recovering more data requires a paid licence.
Before installing any recovery tool, avoid writing new data to the affected drive. Install the software on a different drive whenever possible, and save recovered files somewhere other than the source drive.
Mistakes that can make files impossible to recover
Many unsuccessful recovery attempts come down to a few avoidable mistakes. Here's what to avoid when you realise a file is missing:
- Saving recovered files to the same drive. This can overwrite the data you're trying to recover. Always choose a different drive for recovered files.
- Installing recovery software on the affected drive. Installing software creates new data on the drive and may overwrite deleted files. Use another drive whenever possible, or run a suitable portable recovery tool.
- Continuing to use the computer as usual. Downloads, updates, browser activity and temporary files can write new data to the drive. Minimise unnecessary activity and begin recovery as soon as possible.
- Emptying the Recycle Bin or running cleanup tools. Emptying the bin removes an easy way to restore deleted files. Disk Cleanup and Storage Sense can also remove files from the Recycle Bin according to their settings.
- Formatting or optimising the drive unnecessarily. Formatting can make recovery more difficult, while SSD maintenance operations involving TRIM may reduce the chances of recovering deleted data. Avoid these operations until you've considered your recovery options.
- Running repair tools on a failing drive. If a drive makes unusual clicking or grinding noises, repeatedly disconnects or becomes extremely slow, stop using it. Further scans and repairs may worsen the situation. For important data, consider professional recovery before attempting additional repairs.
- Downloading cracked or suspicious recovery software. Recovery tools may need extensive access to your files and storage devices. Download them only from the developer's official website or a trusted official store.
How to avoid losing files again
File recovery is a last resort; a tested backup gives you a much safer way to get your data back. Spend a few minutes setting up a backup routine now, and you'll be better prepared if something goes wrong.
- Set up File History. Connect an external drive, then open Control Panel and go to System and Security → File History. Turn it on and check that your important folders are included in the backup.
- Back up important folders with OneDrive. Enable folder backup for the folders you want to protect. Remember that synchronisation is not a complete substitute for an independent backup, because deletions can also synchronise. The online Recycle Bin can help, subject to the account's retention period and settings.
- Follow the 3-2-1 backup rule. Keep three copies of important data, store them on two different types of storage, and keep one copy off-site, such as in a separate location or a cloud backup service.
- Test your backups. Restore a sample file occasionally to make sure the backup works and that you know how to recover your data when you need it.
My experience recovering deleted files
I wanted to compare these recovery methods in practice, so I tried them on a Windows 11 laptop using test files that I could safely delete. The setup included an NTFS system drive and a separate exFAT USB drive. This allowed me to explore the different recovery options without risking important personal documents.
Ctrl + Z and the Recycle Bin were the quickest solutions. When the deletion could still be undone or the files were still in the Recycle Bin, restoring them took only a few seconds. In these cases, there was no reason to install additional software or run a deeper scan.
Previous Versions depended entirely on the available backups. The feature was useful only when Windows had a suitable previous version to show. When no saved version was available, there was nothing to restore. I also found copying an individual file safer than restoring an entire folder, because it avoided replacing newer files with older versions.
Windows File Recovery required more attention. On the NTFS drive, Regular mode with the /n filter was suitable for searching for recently deleted test documents. The recovery process was less straightforward on the exFAT USB drive, where Extensive mode was the appropriate option. The scan took longer, and recovery results depended on whether the original data was still available.
The command-line tool also required careful setup. It needs to run with the appropriate permissions, and the destination must be a different drive from the one being scanned. Once I checked the administrator permissions and selected the separate USB drive as the destination, I could proceed with the recovery attempt.
Recuva produced mixed results. A Deep Scan can find files that a quicker scan misses, but finding a filename doesn't guarantee that the file is intact. Recovery status indicators are useful as a guide, yet the only reliable way to check a recovered document or photo is to open it and inspect its contents.
My main takeaway is straightforward: stop writing new data to the affected drive as soon as you notice that files are missing, and save any recovered files to a separate drive. This reduces the risk of overwriting data that may still be recoverable. No recovery tool can guarantee success, particularly when the original data has already been overwritten or cleared by the storage device.
One final point about Previous Versions: this feature is useful only when a suitable previous version or backup exists. If Windows has no saved copy of the folder, there is nothing to restore through this method. Checking your backup settings in advance can save you considerable trouble later.
💬 Comments